Linux basic commands and bash shell scripting by Abhilash
Getting Started with Linux Commands and Bash Shell Scripting by Abhilash:-

- pwd:-it prints the full path of current working directory
- ls:-it is the list command which shows all files and directories that present in current working directory
- {blue:- dir/folder,white:-files,green:-executable files}
- ls -a:-lists all files including hidden files(hidden files name begin with dot)
- ls -l:-lists all attributes of all files in current directory
- ls -t:- here -t option represents the order of modification i.e.the last modified placed first
- ls -S:- it gives the biggest file in size first in the output
- ls --version:-it checks the version of ls command
- cd:-it is used to change the directory
- clear and exit:-it is used to clear the terminal and close the terminal
- cat:-it can be used to view some file,it can be used to create some file using cat > {here we need to enter some details when the prompt came here and then we can save the file using ctl D)
- ex:-
- cat > newfile.txt {here we created the file in the following way}
- cat newfile.txt > copyofnewfile.txt{here we can copy the one file to another newly created file}
- cat newfile.txt copyofnewfile.txt > newfile1.txt {can concatenate the one file,other file to newly created another file}
- cat >> newfile1.txt {to append the content of file}
-
- passwd{to change to password of the user}
- used to change the password for a user
- whoami{to find the user}
- find{it is used to search for files and directories}
- find the file whose name is new.txt in current working directory:-
- find . -name new.txt
- {command currentworkingdirectory -options filename}
- Contains both capital and small letters in /home directory
- find /home -iname new.txt
- find directoryname -name filename.txt
- find directoryname -name filename.*
- find directoryname -name *.txt
- find directories:-
- find /home -type d -name Desktop
- {find directorypath directory representation -name directory name}
- find all empty files:-
- find /home -type f -empty
- find all empty directories:-
- find /home -type d -empty
- find 10 MB files:-
- find /home -size 10MB
- find all files based on user:-
- find /home -user tony
- alias{it is used to customize a command}
- alias command is used to define alternate shortcut for actual long command
- alias c=clear
- then just type c we can observed that termnial has been clear
- touch{it is used to create empty files,also used to change timestamp on existing files or directories}
- touch file1 file2 file3
- touch can be used to change the access and modification time i.e. -m used to change the modification time and -a used to change the access time.
- touch -m file1
- touch -a file2
- these above time related stats can be viewed using stat keyword
- touch -d "date time" file1
- {this above will set the modify timestamp to that particular date}
- mkdir:-it is a way to create a directory
- mkdir new1{creating directory}
- mkdir new1/a{creating the subdirectory in particular directory}
- mkdir -p newdir/test{it is used to create a directory with the subdirectory}
- mkdir -p newdir/{test1,test2}{it is used to create the multiple subdirectories in a particular directory}
- rm:-it is used to remove a file or directory{directory can be removed using -r}
- it is a permanent deletion
- rm -i filename{it ask confirmation before deletion}
- rm -r directoryname{in these way we can delete the directory}
- mv{it is used to move a file or directory/used to rename a file or directory}
- mv file1 file2{here the content of file1 has been moved to file2 and the file1 got removed}
- but if u wanna rename then just give mv file2 file3{so here now file3 is now actual file but file2 has been removed}
- mv file1.txt dir{move file into directory}
- mv dir1 dir2{move a directory into another directory}
- more:- it reads files and displays text on one screen at a time
- more filename.txt
- less:- it reads the contents of text file on one single screen page at time.
- cp:- it is used to copy a file or directory
- cp file1 file2 dir{here file1 and file2 got copied to dir directory also file1 and file2 will be as it is present in original directory as well}
- cp file1 file2{copy content of one file to another}
- cp -i file1.txt dir{if the file already exists in the directory}
- cp -r dir1 dir2{copy directory}
- head:-{by default it displays starting 10 lines of any files}
- head filename filename{for multiple files}
- head -n filename{display specified number of lines}
- tail:-{by default it displays last 10 lines of any files}
- tail filename filename{for multiple files}
- tail -n filename{display specified number of lines}
- history:-{it is used to display the history of commands executed by the user}
- history 5{display the recent 5 commands}
- !command{here it displays the command entered by user}
- echo{it will display lines of text or string}
- echo -e "hello\ntony"{here we can use \n to enter into new line}
- echo -e "hello\ttony"{here we can use \t to enter into new tab}
- if v="2"
- and then use echo $v it will print the value as 2
- control c used to stop any command in terminal safely,it it doesn't stop with that then press control z to force stop it
- grep{global regular expressions print}:-it is used to filter the content of file which makes our search easy.
- syntax:- grep <options> <pattern> <file>
- ex:-
- {cat exam.txt | grep 5} (or) {grep 5 exam.txt}{it finds the number 5 in exam.txt file and display}
- man:-it is a buildin manual utilizing for linux commands
- man filename
- ls *.fileextension{list all the files with the current extension}
- i.e. ls *.txt{it will give only text file}
- tac:-it displays the file content line in reverse order}
- id:-{it displayes the group id of the user}
- vi:- it is used to write programs of text
- diff:-it compare the contents of two different file
- ping:-it checks the network connectivity
- it test network connectivity
- hostname:-it displays the hostname
- hostname -i{it display the ip address of host}
- chmod:-used to change the user/group permission to access the file
# The first digit represents the owner of the file/directory
# The second digit represents the group that the file/directory belongs to
# The third digit represents all other users
# 0 (no permission)
# 1 (execute only)
# 2 (write only)
# 3 (write and execute)
# 4 (read only)
# 5 (read and execute)
# 6 (read and write)
# 7 (read, write, and execute)

chmod 700 file.txt
Visit chmod calculator
http://www.onlineconversion.com/html_chmod_calculator.htm
Mode
can be specified with octal numbers or with letters
The octal (0-7) value is calculated by
adding up the values for each digit like:-
chmod 400 file - Read by owner
chmod 040 file - Read by group
chmod 004 file - Read by world
chmod 200 file - Write by owner
chmod 020 file - Write by group
chmod 002 file - Write by world
chmod 100 file - execute by owner
chmod 010 file - execute by group
chmod 001 file - execute by world
To combine these, just add the numbers
together:
chmod 444 file - Allow read permission to
owner and group and world
chmod 777 file - Allow everyone to read,
write, and execute file
When chmod is applied to a directory:
read = list files in the directory
write = add new files to the directory
execute = access files in the directory

# The first digit represents the owner of the file/directory
# The second digit represents the group that the file/directory belongs to
# The third digit represents all other users
# 0 (no permission)
# 1 (execute only)
# 2 (write only)
# 3 (write and execute)
# 4 (read only)
# 5 (read and execute)
# 6 (read and write)
# 7 (read, write, and execute)
chmod 700 file.txtVisit chmod calculator
http://www.onlineconversion.com/html_chmod_calculator.htm
Mode can be specified with octal numbers or with letters
The octal (0-7) value is calculated by
adding up the values for each digit like:-
chmod 400 file - Read by owner
chmod 040 file - Read by group
chmod 004 file - Read by world
chmod 200 file - Write by owner
chmod 020 file - Write by group
chmod 002 file - Write by world
chmod 100 file - execute by owner
chmod 010 file - execute by group
chmod 001 file - execute by world
To combine these, just add the numbers
together:
chmod 444 file - Allow read permission to
owner and group and world
chmod 777 file - Allow everyone to read,
write, and execute file
When chmod is applied to a directory:
read = list files in the directory
write = add new files to the directory
execute = access files in the directory
Shutdown Command
shutdown schedules a time for the system to be powered down. It may be used to halt, power-off or reboot the machine.
You may specify a time string (which is usually “now” or “hh:mm” for hour/minutes) as the first argument. Additionally, you may set a wall message to be sent to all logged-in users before the system goes down.
If the time argument is used, 5 minutes before the system goes down the /run/nologin file is created to ensure that further logins will not be allowed.
Examples of shutdown commands:
To cancel a pending shutdown, simply type the command below:
Halt Command
halt instructs the hardware to stop all CPU functions, but leaves it powered on. You can use it to get the system to a state where you can perform low level maintenance.
Note that in some cases it completely shuts down the system. Below are examples of halt commands:
halt instructs the hardware to stop all CPU functions, but leaves it powered on. You can use it to get the system to a state where you can perform low level maintenance.
Note that in some cases it completely shuts down the system. Below are examples of halt commands:
Power off Command
poweroff sends an ACPI signal which instructs the system to power down.
The following are examples of poweroff commands:
poweroff sends an ACPI signal which instructs the system to power down.
The following are examples of poweroff commands:
Reboot Command
reboot instructs the system to restart.
chown
The chown command is used to change the
owner and group of files, directories and links. By default, the owner of a filesystem object
is the user that created it. The group is a set of users that share the same
access permissions (i.e., read, write and execute) for that object. The basic syntax for using chown to change
owners is
chown
[options] new_owner object(s)
new_owner is the user name or the numeric
user ID (UID) of the new owner, and object is the name of the target file,
directory or link. The ownership of any number of objects can be changed
simultaneously.
For example, the following would transfer
the ownership of a file named file1 and a directory named dir1 to a new owner
named alice:
chown alice file1 dir1
The basic syntax for using chown to change
groups is
chown [options] :new_group object(s)
or
chown
[options] .new_group object(s)
chgrp
Changes
the group ownership of a file or directory.
Syntax
chgrp
[ -f ]
[ -h
] [-R ]
Group { File ... | Directory ... }
chgrp
-R
[ -f ]
[ -H
| -L
| -P
] Group { File... | Directory... }
Description
The chgrp command changes the
group of the file or directory specified by the File or Directory
parameter to the group specified by the Group parameter. The value of
the Group parameter can be a group name from the group database or a
numeric group ID. When a symbolic link is encountered and you have not
specified the -h or -P flags, the chgrp command changes
the group ownership of the file or directory pointed to by the link and not the
group ownership of the link itself.
- Awk is a scripting language used for manipulating data and generating reports. The awk command programming language requires no compiling and allows the user to use variables, numeric functions, string functions, and logical operators.
Awk is a utility that enables a programmer to write tiny but effective programs in the form of statements that define text patterns that are to be searched for in each line of a document and the action that is to be taken when a match is found within a line. Awk is mostly used for pattern scanning and processing. It searches one or more files to see if they contain lines that matches with the specified patterns and then perform the associated actions.
Awk is abbreviated from the names of the developers – Aho, Weinberger, and Kernighan.
WHAT CAN WE DO WITH AWK?
1. AWK Operations:
(a) Scans a file line by line
(b) Splits each input line into fields
(c) Compares input line/fields to pattern
(d) Performs action(s) on matched lines
2. Useful For:
(a) Transform data files
(b) Produce formatted reports
3. Programming Constructs:
(a) Format output lines
(b) Arithmetic and string operations
(c) Conditionals and loops
Syntax:
awk options 'selection _criteria {action }' input-file > output-fileOptions:
-f program-file : Reads the AWK program source from the file
                  program-file, instead of from the
                  first command line argument.
-F fs            : Use fs for the input field separator
Sample Commands
Example:
Consider the following text file as the input file for all cases below:
$cat > employee.txt
ajay manager account 45000
sunil clerk account 25000
varun manager sales 50000
amit manager account 47000
tarun peon sales 15000
deepak clerk sales 23000
sunil peon sales 13000
satvik director purchase 80000
1. Default behavior of Awk: By default Awk prints every line of data from the specified file.
$ awk '{print}' employee.txtOutput:
ajay manager account 45000
sunil clerk account 25000
varun manager sales 50000
amit manager account 47000
tarun peon sales 15000
deepak clerk sales 23000
sunil peon sales 13000
satvik director purchase 80000
In the above example, no pattern is given. So the actions are applicable to all the lines. Action print without any argument prints the whole line by default, so it prints all the lines of the file without failure.
2. Print the lines which match the given pattern.
$ awk '/manager/ {print}' employee.txt Output:
ajay manager account 45000
varun manager sales 50000
amit manager account 47000
In the above example, the awk command prints all the line which matches with the ‘manager’.
3. Splitting a Line Into Fields : For each record i.e line, the awk command splits the record delimited by whitespace character by default and stores it in the $n variables. If the line has 4 words, it will be stored in $1, $2, $3 and $4 respectively. Also, $0 represents the whole line.
$ awk '{print $1,$4}' employee.txt Output:
ajay 45000
sunil 25000
varun 50000
amit 47000
tarun 15000
deepak 23000
sunil 13000
satvik 80000
In the above example, $1 and $4 represents Name and Salary fields respectively.
Built-In Variables In Awk
Awk’s built-in variables include the field variables—$1, $2, $3, and so on ($0 is the entire line) — that break a line of text into individual words or pieces called fields.
- NR: NR command keeps a current count of the number of input records. Remember that records are usually lines. Awk command performs the pattern/action statements once for each record in a file.
- NF: NF command keeps a count of the number of fields within the current input record.
- FS: FS command contains the field separator character which is used to divide fields on the input line. The default is “white space”, meaning space and tab characters. FS can be reassigned to another character (typically in BEGIN) to change the field separator.
- RS: RS command stores the current record separator character. Since, by default, an input line is the input record, the default record separator character is a newline.
- OFS: OFS command stores the output field separator, which separates the fields when Awk prints them. The default is a blank space. Whenever print has several parameters separated with commas, it will print the value of OFS in between each parameter.
- ORS: ORS command stores the output record separator, which separates the output lines when Awk prints them. The default is a newline character. print automatically outputs the contents of ORS at the end of whatever it is given to print.
Examples:
Use of NR built-in variables (Display Line Number)
$ awk '{print NR,$0}' employee.txt Output:
1 ajay manager account 45000
2 sunil clerk account 25000
3 varun manager sales 50000
4 amit manager account 47000
5 tarun peon sales 15000
6 deepak clerk sales 23000
7 sunil peon sales 13000
8 satvik director purchase 80000
In the above example, the awk command with NR prints all the lines along with the line number.
Use of NF built-in variables (Display Last Field)
$ awk '{print $1,$NF}' employee.txt Output:
ajay 45000
sunil 25000
varun 50000
amit 47000
tarun 15000
deepak 23000
sunil 13000
satvik 80000
In the above example $1 represents Name and $NF represents Salary. We can get the Salary using $NF , where $NF represents last field.
Another use of NR built-in variables (Display Line From 3 to 6)
$ awk 'NR==3, NR==6 {print NR,$0}' employee.txt Output:
3 varun manager sales 50000
4 amit manager account 47000
5 tarun peon sales 15000
6 deepak clerk sales 23000
More Examples
For the given text file:
$cat > geeksforgeeks.txt

A    B    C
Tarun    A12    1
Man    B6    2
Praveen    M42    3
1) To print the first item along with the row number(NR) separated with ” – “ from each line in geeksforgeeks.txt:
$ awk '{print NR "- " $1 }' geeksforgeeks.txt 1 - A
2 - Tarun
3 – Manav
4 - Praveen
2) To return the second column/item from geeksforgeeks.txt:
The question should be:- To return the second column/item from geeksforgeeks.txt:
$ awk '{print $2}' geeksforgeeks.txt B
A12
B6
M42
3) To print any non empty line if present
$ awk 'NF < 0' geeksforgeeks.txt
here NF should be 0 not less than and the user have to print the line number also:
correct answer : awk ‘NF == 0 {print NR}’ geeksforgeeks.txt
OR
awk ‘NF <= 0 {print NR}’ geeksforgeeks.txt
0
4) To find the length of the longest line present in the file:
$ awk '{ if (length($0) > max) max = length($0) } END { print max }' geeksforgeeks.txt13
5) To count the lines in a file:
$ awk 'END { print NR }' geeksforgeeks.txt 3
6) Printing lines with more than 10 characters:
$ awk 'length($0) > 10' geeksforgeeks.txt
Tarun    A12    1
Praveen    M42    3
7) To find/check for any string in any specific column:
$ awk '{ if($3 == "B6") print $0;}' geeksforgeeks.txt8) To print the squares of first numbers from 1 to n say 6:
$ awk 'BEGIN { for(i=1;i<=6;i++) print "square of", i, "is",i*i; }' square of 1 is 1
square of 2 is 4
square of 3 is 9
square of 4 is 16
square of 5 is 25
square of 6 is 36
- *SED command in UNIX stands for stream editor and it can perform lots of functions on file like searching, find and replace, insertion or deletion. Though most common use of SED command in UNIX is for substitution or for find and replace. By using SED you can edit files even without opening them, which is much quicker way to find and replace something in file, than first opening that file in VI Editor and then changing it.
- SED is a powerful text stream editor. Can do insertion, deletion, search and replace(substitution).
- SED command in unix supports regular expression which allows it perform complex pattern matching.
Syntax:
sed OPTIONS... [SCRIPT] [INPUTFILE...]
Example:
Consider the below text file as an input.
$cat > geekfile.txt
unix is great os. unix is opensource. unix is free os.
learn operating system.
unix linux which one you choose.
unix is easy to learn.unix is a multiuser os.Learn unix .unix is a powerful.
Sample Commands
- Replacing or substituting string : Sed command is mostly used to replace the text in a file. The below simple sed command replaces the word “unix” with “linux” in the file.
$sed 's/unix/linux/' geekfile.txt
Output :
linux is great os. unix is opensource. unix is free os.
learn operating system.
linux linux which one you choose.
linux is easy to learn.unix is a multiuser os.Learn unix .unix is a powerful.
Here the “s” specifies the substitution operation. The “/” are delimiters. The “unix” is the search pattern and the “linux” is the replacement string.
By default, the sed command replaces the first occurrence of the pattern in each line and it won’t replace the second, third…occurrence in the line.
- Replacing the nth occurrence of a pattern in a line : Use the /1, /2 etc flags to replace the first, second occurrence of a pattern in a line. The below command replaces the second occurrence of the word “unix” with “linux” in a line.
$sed 's/unix/linux/2' geekfile.txt
Output:
unix is great os. linux is opensource. unix is free os.
learn operating system.
unix linux which one you choose.
unix is easy to learn.linux is a multiuser os.Learn unix .unix is a powerful.
- Replacing all the occurrence of the pattern in a line : The substitute flag /g (global replacement) specifies the sed command to replace all the occurrences of the string in the line.
$sed 's/unix/linux/g' geekfile.txt
Output :
linux is great os. linux is opensource. linux is free os.
learn operating system.
linux linux which one you choose.
linux is easy to learn.linux is a multiuser os.Learn linux .linux is a powerful.
- Replacing from nth occurrence to all occurrences in a line : Use the combination of /1, /2 etc and /g to replace all the patterns from the nth occurrence of a pattern in a line. The following sed command replaces the third, fourth, fifth… “unix” word with “linux” word in a line.
$sed 's/unix/linux/3g' geekfile.txt
Output:
unix is great os. unix is opensource. linux is free os.
learn operating system.
unix linux which one you choose.
unix is easy to learn.unix is a multiuser os.Learn linux .linux is a powerful.
- Parenthesize first character of each word : This sed example prints the first character of every word in parenthesis.
$ echo "Welcome To The Geek Stuff" | sed 's/\(\b[A-Z]\)/\(\1\)/g'
Output:
(W)elcome (T)o (T)he (G)eek (S)tuff
- Replacing string on a specific line number : You can restrict the sed command to replace the string on a specific line number. An example is
$sed '3 s/unix/linux/' geekfile.txt
Output:
unix is great os. unix is opensource. unix is free os.
learn operating system.
linux linux which one you choose.
unix is easy to learn.unix is a multiuser os.Learn unix .unix is a powerful.
The above sed command replaces the string only on the third line.
- Duplicating the replaced line with /p flag : The /p print flag prints the replaced line twice on the terminal. If a line does not have the search pattern and is not replaced, then the /p prints that line only once.
$sed 's/unix/linux/p' geekfile.txt
Output:
linux is great os. unix is opensource. unix is free os.
linux is great os. unix is opensource. unix is free os.
learn operating system.
linux linux which one you choose.
linux linux which one you choose.
linux is easy to learn.unix is a multiuser os.Learn unix .unix is a powerful.
linux is easy to learn.unix is a multiuser os.Learn unix .unix is a powerful.
- Printing only the replaced lines : Use the -n option along with the /p print flag to display only the replaced lines. Here the -n option suppresses the duplicate rows generated by the /p flag and prints the replaced lines only one time.
$sed -n 's/unix/linux/p' geekfile.txt
Output:
linux is great os. unix is opensource. unix is free os.
linux linux which one you choose.
linux is easy to learn.unix is a multiuser os.Learn unix .unix is a powerful.
If you use -n alone without /p, then the sed does not print anything.
- Replacing string on a range of lines : You can specify a range of line numbers to the sed command for replacing a string.
$sed '1,3 s/unix/linux/' geekfile.txt
Output:
linux is great os. unix is opensource. unix is free os.
learn operating system.
linux linux which one you choose.
unix is easy to learn.unix is a multiuser os.Learn unix .unix is a powerful.
Here the sed command replaces the lines with range from 1 to 3. Another example is
$sed '2,$ s/unix/linux/' geekfile.txt
Output:
unix is great os. unix is opensource. unix is free os.
learn operating system.
linux linux which one you choose.
linux is easy to learn.unix is a multiuser os.Learn unix .unix is a powerful
Here $ indicates the last line in the file. So the sed command replaces the text from second line to last line in the file.
- Deleting lines from a particular file : SED command can also be used for deleting lines from a particular file. SED command is used for performing deletion operation without even opening the file
Examples:
1. To Delete a particular line say n in this exampleSyntax:
$ sed 'nd' filename.txt
Example:
$ sed '5d' filename.txt
2. To Delete a last line
Syntax:
$ sed '$d' filename.txt
3. To Delete line from range x to y
Syntax:
$ sed 'x,yd' filename.txt
Example:
$ sed '3,6d' filename.txt
4. To Delete from nth to last line
Syntax:
$ sed 'nth,$d' filename.txt
Example:
$ sed '12,$d' filename.txt
5. To Delete pattern matching line
Syntax:
$ sed '/pattern/d' filename.txt
Example:
$ sed '/abc/d' filename.txt
- Part2 of SED:-
SED is used for finding, filtering, text substitution, replacement and text manipulations like insertion, deletion search, etc. It’s a one of the powerful utilities offered by Linux/Unix systems. We can use sed with regular expressions. I hope atleast you have the basic knowledge about Linux regular expressions.
It provides Non-interactive editing of text files that’s why it’s used to automate editing and has two buffers – pattern buffer and hold buffer. Sed use Pattern buffer when it read files, line by line and that currently read line is inserted into pattern buffer whereas hold buffer is a long-term storage, it catch the information, store it and reuse it when it is needed. Initially, both are empty. SED command is used for performing different operations without even opening the file.
sed general syntax –
sed OPTIONS… [SCRIPT] [INPUTFILE…]
First create a.txt file on which I am going to perform operations for SED commands. In this blog, I used “a.txt” file to explain all the examples. Blog will become too long if i write the output of each sed command. So, you may refer the same file to practice all the commands initially.
[root@rhel7 ~]# cat a.txt
life isn't meant to be easy, life is meant to be lived.
Try to learn & understand something new everyday in life.
Respect everyone & most important love everyone.
Don’t hesitate to ask for love & don’t hesitate to show love too.
Life is too short to be shy.
In life, experience will help you differentiating right from wrong.
# Let’s start with File Spacing
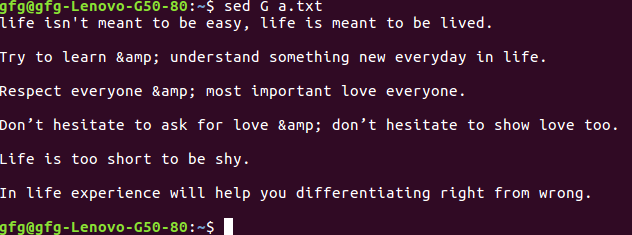
1 – Insert one blank line after each line –
[root@rhel7 ~]# sed G a.txt
2 – To insert two blank lines –
[root@rhel7 ~]# sed 'G;G' a.txt
3 – Delete blank lines and insert one blank line after each line –
[root@rhel7 ~]# sed '/^$/d;G' a.txt
4 – Insert a black line above every line which matches “love” –
[root@rhel7 ~]# sed '/love/{x;p;x;}' a.txt5 – Insert a blank line below every line which matches “love” –
[root@rhel7 ~]# sed '/love/G' a.txt
6 – Insert 5 spaces to the left of every lines –
[root@rhel7 ~]# sed 's/^/ /' a.txt
# Numbering lines
1 – Number each line of a file (left alignment). **=** is used to number the line. \t is used for tab between number and sentence –
[root@rhel7 ~]# sed = a.txt | sed 'N;s/\n/\t/'
2 – Number each line of a file (number on left, right-aligned). This command is similar to `cat -n filename`.
[root@rhel7 ~]# sed = a.txt | sed 'N; s/^/ /; s/ *\(.\{4,\}\)\n/\1 /'3 – Number each line of file, only if line is not blank –
[root@rhel7 ~]# sed '/./=' a.txt | sed '/./N; s/\n/ /'
# Deleting lines
1 – Delete a particular line –
Syntax: sed ‘nd’ filename
Example :
[root@rhel7 ~]# sed '5d' a.txt
2 – Delete the last line
Syntax: sed ‘$d’ filename
3 – Delete line from range x to y
Syntax: sed ‘x,yd’ filename
Example :
[root@rhel7 ~]# sed '3,5d' a.txt
4 – Delete from nth to last line
Syntax: sed ‘nth,$d’ filename
Example :
[root@rhel7 ~]# sed '2,$d' a.txt
5 – Delete the pattern matching line –
Syntax: sed ‘/pattern/d’ filename
Example :
[root@rhel7 ~]# sed '/life/d' a.txt
6 – Delete lines starting from nth line and every 2nd line from there –
Syntax: sed ‘n~2d’ filename
Example :
[root@rhel7 ~]# sed '3~2d' a.txt
7 – Delete the lines which matches the pattern and 2 lines after to that –
Syntax: sed ‘/pattern/,+2d’ filename
Example :
[root@rhel7 ~]# sed '/easy/,+2d' a.txt
8 – Delete blank Lines
[root@rhel7 ~]# sed '/^$/d' a.txt
9 – Delete empty lines or those begins with “#” –
[root@rhel7 ~]# sed -i '/^#/d;/^$/d' a.txt
# View/Print the files
If we want to view content of file, then we use cat command and if we want to view the bottom and the top content of any file, we use tools such as head and tail. But what if we need to view a particular section in the middle of any file? Here we’ll discuss, how to use SED command to view a section of any file.
1 – Viewing a file from x to y range –
Syntax: sed -n ‘x,yp’ filename
Example :
[root@rhel7 ~]# sed -n '2,5p' a.txt
2 – View the entire file except the given range –
Syntax: sed ‘x,yd’ filename
Example :
[root@rhel7 ~]# sed '2,4d' a.txt
3 – Print nth line of the file –
Syntax: sed -n ‘address’p filename
Example :
[root@rhel7 ~]# sed -n '4'p a.txt
4 – Print lines from xth line to yth line.
Syntax: sed -n ‘x,y’p filename
Example :
[root@rhel7 ~]# sed -n '4,6'p a.txt
5 – Print only the last line –
Syntax: sed -n ‘$’p filename
6 – Print from nth line to end of file –
Syntax: sed -n ‘n,$p’ filename
Example :
[root@rhel7 ~]# sed -n '3,$'p a.txt
Pattern Printing
7 – Print the line only which matches the pattern –
Syntax: sed -n /pattern/p filename
Example :
[root@rhel7 ~]# sed -n /every/p a.txt
8 – Print lines which matches the pattern i.e from input to xth line.
Syntax: sed -n ‘/pattern/,xp’ filename
Example :
[root@rhel7 ~]# sed -n '/everyone/,5p' a.txt
Following prints lines which matches the pattern, 3rd line matches the pattern “everyone”, so it prints from 3rd line to 5th line. Use $ in place of 5, if want to print the file till end.
9 – Prints lines from the xth line of the input, up-to the line which matches the pattern. If the pattern doesn’t found then it prints up-to end of the file.
Syntax: sed -n ‘x,/pattern/p’ filename
Example :
sed -n '1,/everyone/p' a.txt
10 – Print the lines which matches the pattern up-to the next xth lines –
Syntax: sed -n ‘/pattern/,+xp’ filename
Example :
sed -n '/learn/,+2p' a.txt
# Replacement with the sed command
1 – Change the first occurrence of the pattern –
[root@rhel7 ~]# sed 's/life/leaves/' a.txt
2 – Replacing the nth occurrence of a pattern in a line –
Syntax: sed ‘s/old_pattern/new_pattern/n’ filename
Example :
[root@rhel7 ~]# sed 's/to/two/2' a.txt
We wrote “2” because we replaces the second occurrence. Likewise you can use 3, 4 etc according to need.
3 – Replacing all the occurrence of the pattern in a line.
[root@rhel7 ~]# sed 's/life/learn/g' a.txt
4 – Replace pattern from nth occurrence to all occurrences in a line.
Syntax: sed ‘s/old_pattern/new_pattern/ng’ filename
Example :
[root@rhel7 ~]# sed 's/to/TWO/2g' a.txt
Note – This sed command replaces the second, third, etc occurrences of pattern “to” with “TWO” in a line.
If you wish to print only the replaced lines, then use “-n” option along with “/p” print flag to display only the replaced lines –
[root@rhel7 ~]# sed -n 's/to/TWO/p' a.txt
And if you wish to print the replaced lines twice, then only use “/p” print flag without “-n” option-
[root@rhel7 ~]# sed 's/to/TWO/p' a.txt
5 – Replacing pattern on a specific line number. Here, “m” is the line number.
Syntax: sed ‘m s/old_pattern/new_pattern/’ filename
Example :
[root@rhel7 ~]# sed '3 s/every/each/' a.txt
If you wish to print only the replaced lines –
[root@rhel7 ~]# sed -n '3 s/every/each/p' a.txt
6 – Replace string on a defined range of lines –
Syntax: sed ‘x,y s/old_pattern/new_pattern/’ filename
where,
x = starting line number
and y = ending line number
Example :
[root@rhel7 ~]# sed '2,5 s/to/TWO/' a.txt
Note – $ can be used in place of “y” if we wish to change the pattern up-to last line in the file.
Example :
[root@rhel7 ~]# sed '2,$ s/to/TWO/' a.txt
7 – If you wish to replace pattern in order to ignore character case (beginning with uppercase or lowercase), then there are two ways to replace such patterns –
First, By using “/i” print flag –
Syntax: sed ‘s/old_pattern/new_pattern/i’ filename
Example :
[root@rhel7 ~]# sed 's/life/Love/i' a.txt
Second, By using regular expressions –
[root@rhel7 ~]# sed 's/[Ll]ife/Love/g' a.txt
8 – To replace multiple spaces with a single space –
[root@rhel7 clang]# sed 's/ */ /g' filename
9 – Replace one pattern followed by the another pattern –
Syntax: sed ‘/followed_pattern/ s/old_pattern/new_pattern/’ filename
Example :
[root@rhel7 ~]# sed '/is/ s/live/love/' a.txt
10 – Replace a pattern with other except in the nth line.
Syntax: sed ‘n!s/old_pattern/new_pattern/’ filename
Example :
[root@rhel7 ~]# sed -i '5!s/life/love/' a.txt
- nl:-used to display the line numbers
- wc:-given number of lines,words and characters available in the file content
- wc -l filename:-no. of lines in the file
- wc -c filename:-no. of characters in the file
- unique:-remove the duplicates of file content{it can remove only continuous duplicates}
- rmdir:-it removes the specified directory{it removes only empty directory}
- cal:-it displays the current month calender
- date:-displays the system current date
- who:-it displays the list of all users loggedin currently in server
- Systems information commands:-df:-it shows the disk free space,du:-shows the disk usage,free:-it displays the free and used memory on system
- pipe operator:-{|}
- to take the o/p of 1st command and give as i/p to 2nd command
- ex:-
- cat file.txt | head -5 | tail -2{ here file.txt will be open taking as input to head which will list top 5 rows and taking as input to tail which will list last 2 rows will display it}
- which command in Linux is a command which is used to locate the executable file associated with the given command
htop - an interactive process viewer and system monitor
reboot instructs the system to restart.
chown
The chown command is used to change the
owner and group of files, directories and links. By default, the owner of a filesystem object
is the user that created it. The group is a set of users that share the same
access permissions (i.e., read, write and execute) for that object. The basic syntax for using chown to change
owners is
chown
[options] new_owner object(s)
new_owner is the user name or the numeric
user ID (UID) of the new owner, and object is the name of the target file,
directory or link. The ownership of any number of objects can be changed
simultaneously.
For example, the following would transfer
the ownership of a file named file1 and a directory named dir1 to a new owner
named alice:
chown alice file1 dir1
The basic syntax for using chown to change
groups is
chown [options] :new_group object(s)
or
chown
[options] .new_group object(s)
chgrp
Changes
the group ownership of a file or directory.
Syntax
chgrp
[ -f ]
[ -h
] [-R ]
Group { File ... | Directory ... }
chgrp
-R
[ -f ]
[ -H
| -L
| -P
] Group { File... | Directory... }
Description
The chgrp command changes the
group of the file or directory specified by the File or Directory
parameter to the group specified by the Group parameter. The value of
the Group parameter can be a group name from the group database or a
numeric group ID. When a symbolic link is encountered and you have not
specified the -h or -P flags, the chgrp command changes
the group ownership of the file or directory pointed to by the link and not the
group ownership of the link itself.
- Awk is a scripting language used for manipulating data and generating reports. The awk command programming language requires no compiling and allows the user to use variables, numeric functions, string functions, and logical operators.
Awk is a utility that enables a programmer to write tiny but effective programs in the form of statements that define text patterns that are to be searched for in each line of a document and the action that is to be taken when a match is found within a line. Awk is mostly used for pattern scanning and processing. It searches one or more files to see if they contain lines that matches with the specified patterns and then perform the associated actions.
Awk is abbreviated from the names of the developers – Aho, Weinberger, and Kernighan.
WHAT CAN WE DO WITH AWK?
1. AWK Operations:
(a) Scans a file line by line
(b) Splits each input line into fields
(c) Compares input line/fields to pattern
(d) Performs action(s) on matched lines
2. Useful For:
(a) Transform data files
(b) Produce formatted reports
3. Programming Constructs:
(a) Format output lines
(b) Arithmetic and string operations
(c) Conditionals and loops
Syntax:
awk options 'selection _criteria {action }' input-file > output-fileOptions:
-f program-file : Reads the AWK program source from the file
program-file, instead of from the
first command line argument.
-F fs : Use fs for the input field separatorSample Commands
Example:
Consider the following text file as the input file for all cases below:
$cat > employee.txt
ajay manager account 45000 sunil clerk account 25000 varun manager sales 50000 amit manager account 47000 tarun peon sales 15000 deepak clerk sales 23000 sunil peon sales 13000 satvik director purchase 80000
1. Default behavior of Awk: By default Awk prints every line of data from the specified file.
$ awk '{print}' employee.txtOutput:
ajay manager account 45000 sunil clerk account 25000 varun manager sales 50000 amit manager account 47000 tarun peon sales 15000 deepak clerk sales 23000 sunil peon sales 13000 satvik director purchase 80000
In the above example, no pattern is given. So the actions are applicable to all the lines. Action print without any argument prints the whole line by default, so it prints all the lines of the file without failure.
2. Print the lines which match the given pattern.
$ awk '/manager/ {print}' employee.txt Output:
ajay manager account 45000 varun manager sales 50000 amit manager account 47000
In the above example, the awk command prints all the line which matches with the ‘manager’.
3. Splitting a Line Into Fields : For each record i.e line, the awk command splits the record delimited by whitespace character by default and stores it in the $n variables. If the line has 4 words, it will be stored in $1, $2, $3 and $4 respectively. Also, $0 represents the whole line.
$ awk '{print $1,$4}' employee.txt Output:
ajay 45000 sunil 25000 varun 50000 amit 47000 tarun 15000 deepak 23000 sunil 13000 satvik 80000
In the above example, $1 and $4 represents Name and Salary fields respectively.
Built-In Variables In Awk
Awk’s built-in variables include the field variables—$1, $2, $3, and so on ($0 is the entire line) — that break a line of text into individual words or pieces called fields.
- NR: NR command keeps a current count of the number of input records. Remember that records are usually lines. Awk command performs the pattern/action statements once for each record in a file.
- NF: NF command keeps a count of the number of fields within the current input record.
- FS: FS command contains the field separator character which is used to divide fields on the input line. The default is “white space”, meaning space and tab characters. FS can be reassigned to another character (typically in BEGIN) to change the field separator.
- RS: RS command stores the current record separator character. Since, by default, an input line is the input record, the default record separator character is a newline.
- OFS: OFS command stores the output field separator, which separates the fields when Awk prints them. The default is a blank space. Whenever print has several parameters separated with commas, it will print the value of OFS in between each parameter.
- ORS: ORS command stores the output record separator, which separates the output lines when Awk prints them. The default is a newline character. print automatically outputs the contents of ORS at the end of whatever it is given to print.
Examples:
Use of NR built-in variables (Display Line Number)
$ awk '{print NR,$0}' employee.txt Output:
1 ajay manager account 45000 2 sunil clerk account 25000 3 varun manager sales 50000 4 amit manager account 47000 5 tarun peon sales 15000 6 deepak clerk sales 23000 7 sunil peon sales 13000 8 satvik director purchase 80000
In the above example, the awk command with NR prints all the lines along with the line number.
Use of NF built-in variables (Display Last Field)
$ awk '{print $1,$NF}' employee.txt Output:
ajay 45000 sunil 25000 varun 50000 amit 47000 tarun 15000 deepak 23000 sunil 13000 satvik 80000
In the above example $1 represents Name and $NF represents Salary. We can get the Salary using $NF , where $NF represents last field.
Another use of NR built-in variables (Display Line From 3 to 6)
$ awk 'NR==3, NR==6 {print NR,$0}' employee.txt Output:
3 varun manager sales 50000 4 amit manager account 47000 5 tarun peon sales 15000 6 deepak clerk sales 23000
More Examples
For the given text file:
$cat > geeksforgeeks.txt A B C Tarun A12 1 Man B6 2 Praveen M42 3
1) To print the first item along with the row number(NR) separated with ” – “ from each line in geeksforgeeks.txt:
$ awk '{print NR "- " $1 }' geeksforgeeks.txt 1 - A 2 - Tarun 3 – Manav 4 - Praveen
2) To return the second column/item from geeksforgeeks.txt:
The question should be:- To return the second column/item from geeksforgeeks.txt:
$ awk '{print $2}' geeksforgeeks.txt B A12 B6 M42
3) To print any non empty line if present
$ awk 'NF < 0' geeksforgeeks.txt
here NF should be 0 not less than and the user have to print the line number also:
correct answer : awk ‘NF == 0 {print NR}’ geeksforgeeks.txt
OR
awk ‘NF <= 0 {print NR}’ geeksforgeeks.txt
0
4) To find the length of the longest line present in the file:
$ awk '{ if (length($0) > max) max = length($0) } END { print max }' geeksforgeeks.txt13
5) To count the lines in a file:
$ awk 'END { print NR }' geeksforgeeks.txt 3
6) Printing lines with more than 10 characters:
$ awk 'length($0) > 10' geeksforgeeks.txt
Tarun A12 1 Praveen M42 3
7) To find/check for any string in any specific column:
$ awk '{ if($3 == "B6") print $0;}' geeksforgeeks.txt8) To print the squares of first numbers from 1 to n say 6:
$ awk 'BEGIN { for(i=1;i<=6;i++) print "square of", i, "is",i*i; }' square of 1 is 1 square of 2 is 4 square of 3 is 9 square of 4 is 16 square of 5 is 25 square of 6 is 36
- *SED command in UNIX stands for stream editor and it can perform lots of functions on file like searching, find and replace, insertion or deletion. Though most common use of SED command in UNIX is for substitution or for find and replace. By using SED you can edit files even without opening them, which is much quicker way to find and replace something in file, than first opening that file in VI Editor and then changing it.
- SED is a powerful text stream editor. Can do insertion, deletion, search and replace(substitution).
- SED command in unix supports regular expression which allows it perform complex pattern matching.
Syntax:
sed OPTIONS... [SCRIPT] [INPUTFILE...]
Example:
Consider the below text file as an input.
$cat > geekfile.txt
unix is great os. unix is opensource. unix is free os. learn operating system. unix linux which one you choose. unix is easy to learn.unix is a multiuser os.Learn unix .unix is a powerful.
Sample Commands
- Replacing or substituting string : Sed command is mostly used to replace the text in a file. The below simple sed command replaces the word “unix” with “linux” in the file.
$sed 's/unix/linux/' geekfile.txt
Output :
linux is great os. unix is opensource. unix is free os. learn operating system. linux linux which one you choose. linux is easy to learn.unix is a multiuser os.Learn unix .unix is a powerful.
Here the “s” specifies the substitution operation. The “/” are delimiters. The “unix” is the search pattern and the “linux” is the replacement string.
By default, the sed command replaces the first occurrence of the pattern in each line and it won’t replace the second, third…occurrence in the line.
- Replacing the nth occurrence of a pattern in a line : Use the /1, /2 etc flags to replace the first, second occurrence of a pattern in a line. The below command replaces the second occurrence of the word “unix” with “linux” in a line.
$sed 's/unix/linux/2' geekfile.txt
Output:
unix is great os. linux is opensource. unix is free os. learn operating system. unix linux which one you choose. unix is easy to learn.linux is a multiuser os.Learn unix .unix is a powerful.
- Replacing all the occurrence of the pattern in a line : The substitute flag /g (global replacement) specifies the sed command to replace all the occurrences of the string in the line.
$sed 's/unix/linux/g' geekfile.txt
Output :
linux is great os. linux is opensource. linux is free os. learn operating system. linux linux which one you choose. linux is easy to learn.linux is a multiuser os.Learn linux .linux is a powerful.
- Replacing from nth occurrence to all occurrences in a line : Use the combination of /1, /2 etc and /g to replace all the patterns from the nth occurrence of a pattern in a line. The following sed command replaces the third, fourth, fifth… “unix” word with “linux” word in a line.
$sed 's/unix/linux/3g' geekfile.txt
Output:
unix is great os. unix is opensource. linux is free os. learn operating system. unix linux which one you choose. unix is easy to learn.unix is a multiuser os.Learn linux .linux is a powerful.
- Parenthesize first character of each word : This sed example prints the first character of every word in parenthesis.
$ echo "Welcome To The Geek Stuff" | sed 's/\(\b[A-Z]\)/\(\1\)/g'
Output:
(W)elcome (T)o (T)he (G)eek (S)tuff
- Replacing string on a specific line number : You can restrict the sed command to replace the string on a specific line number. An example is
$sed '3 s/unix/linux/' geekfile.txt
Output:
unix is great os. unix is opensource. unix is free os. learn operating system. linux linux which one you choose. unix is easy to learn.unix is a multiuser os.Learn unix .unix is a powerful.
The above sed command replaces the string only on the third line.
- Duplicating the replaced line with /p flag : The /p print flag prints the replaced line twice on the terminal. If a line does not have the search pattern and is not replaced, then the /p prints that line only once.
$sed 's/unix/linux/p' geekfile.txt
Output:
linux is great os. unix is opensource. unix is free os. linux is great os. unix is opensource. unix is free os. learn operating system. linux linux which one you choose. linux linux which one you choose. linux is easy to learn.unix is a multiuser os.Learn unix .unix is a powerful. linux is easy to learn.unix is a multiuser os.Learn unix .unix is a powerful.
- Printing only the replaced lines : Use the -n option along with the /p print flag to display only the replaced lines. Here the -n option suppresses the duplicate rows generated by the /p flag and prints the replaced lines only one time.
$sed -n 's/unix/linux/p' geekfile.txt
Output:
linux is great os. unix is opensource. unix is free os. linux linux which one you choose. linux is easy to learn.unix is a multiuser os.Learn unix .unix is a powerful.
If you use -n alone without /p, then the sed does not print anything.
- Replacing string on a range of lines : You can specify a range of line numbers to the sed command for replacing a string.
$sed '1,3 s/unix/linux/' geekfile.txt
Output:
linux is great os. unix is opensource. unix is free os. learn operating system. linux linux which one you choose. unix is easy to learn.unix is a multiuser os.Learn unix .unix is a powerful.
Here the sed command replaces the lines with range from 1 to 3. Another example is
$sed '2,$ s/unix/linux/' geekfile.txt
Output:
unix is great os. unix is opensource. unix is free os. learn operating system. linux linux which one you choose. linux is easy to learn.unix is a multiuser os.Learn unix .unix is a powerful
Here $ indicates the last line in the file. So the sed command replaces the text from second line to last line in the file.
- Deleting lines from a particular file : SED command can also be used for deleting lines from a particular file. SED command is used for performing deletion operation without even opening the file
Examples:
1. To Delete a particular line say n in this exampleSyntax: $ sed 'nd' filename.txt Example: $ sed '5d' filename.txt
2. To Delete a last line
Syntax: $ sed '$d' filename.txt
3. To Delete line from range x to y
Syntax: $ sed 'x,yd' filename.txt Example: $ sed '3,6d' filename.txt
4. To Delete from nth to last line
Syntax: $ sed 'nth,$d' filename.txt Example: $ sed '12,$d' filename.txt
5. To Delete pattern matching line
Syntax: $ sed '/pattern/d' filename.txt Example: $ sed '/abc/d' filename.txt
SED is used for finding, filtering, text substitution, replacement and text manipulations like insertion, deletion search, etc. It’s a one of the powerful utilities offered by Linux/Unix systems. We can use sed with regular expressions. I hope atleast you have the basic knowledge about Linux regular expressions.
It provides Non-interactive editing of text files that’s why it’s used to automate editing and has two buffers – pattern buffer and hold buffer. Sed use Pattern buffer when it read files, line by line and that currently read line is inserted into pattern buffer whereas hold buffer is a long-term storage, it catch the information, store it and reuse it when it is needed. Initially, both are empty. SED command is used for performing different operations without even opening the file.
sed general syntax –
sed OPTIONS… [SCRIPT] [INPUTFILE…]
First create a.txt file on which I am going to perform operations for SED commands. In this blog, I used “a.txt” file to explain all the examples. Blog will become too long if i write the output of each sed command. So, you may refer the same file to practice all the commands initially.
[root@rhel7 ~]# cat a.txt life isn't meant to be easy, life is meant to be lived. Try to learn & understand something new everyday in life. Respect everyone & most important love everyone. Don’t hesitate to ask for love & don’t hesitate to show love too. Life is too short to be shy. In life, experience will help you differentiating right from wrong.
# Let’s start with File Spacing
1 – Insert one blank line after each line –
[root@rhel7 ~]# sed G a.txt
2 – To insert two blank lines –
[root@rhel7 ~]# sed 'G;G' a.txt
3 – Delete blank lines and insert one blank line after each line –
[root@rhel7 ~]# sed '/^$/d;G' a.txt
4 – Insert a black line above every line which matches “love” –
[root@rhel7 ~]# sed '/love/{x;p;x;}' a.txt5 – Insert a blank line below every line which matches “love” –
[root@rhel7 ~]# sed '/love/G' a.txt
6 – Insert 5 spaces to the left of every lines –
[root@rhel7 ~]# sed 's/^/ /' a.txt
# Numbering lines
1 – Number each line of a file (left alignment). **=** is used to number the line. \t is used for tab between number and sentence –
[root@rhel7 ~]# sed = a.txt | sed 'N;s/\n/\t/'
2 – Number each line of a file (number on left, right-aligned). This command is similar to `cat -n filename`.
[root@rhel7 ~]# sed = a.txt | sed 'N; s/^/ /; s/ *\(.\{4,\}\)\n/\1 /'3 – Number each line of file, only if line is not blank –
[root@rhel7 ~]# sed '/./=' a.txt | sed '/./N; s/\n/ /'
# Deleting lines
1 – Delete a particular line –
Syntax: sed ‘nd’ filename
Example :
[root@rhel7 ~]# sed '5d' a.txt
2 – Delete the last line
Syntax: sed ‘$d’ filename
3 – Delete line from range x to y
Syntax: sed ‘x,yd’ filename
Example :
[root@rhel7 ~]# sed '3,5d' a.txt
4 – Delete from nth to last line
Syntax: sed ‘nth,$d’ filename
Example :
[root@rhel7 ~]# sed '2,$d' a.txt
5 – Delete the pattern matching line –
Syntax: sed ‘/pattern/d’ filename
Example :
[root@rhel7 ~]# sed '/life/d' a.txt
6 – Delete lines starting from nth line and every 2nd line from there –
Syntax: sed ‘n~2d’ filename
Example :
[root@rhel7 ~]# sed '3~2d' a.txt
7 – Delete the lines which matches the pattern and 2 lines after to that –
Syntax: sed ‘/pattern/,+2d’ filename
Example :
[root@rhel7 ~]# sed '/easy/,+2d' a.txt
8 – Delete blank Lines
[root@rhel7 ~]# sed '/^$/d' a.txt
9 – Delete empty lines or those begins with “#” –
[root@rhel7 ~]# sed -i '/^#/d;/^$/d' a.txt
# View/Print the files
If we want to view content of file, then we use cat command and if we want to view the bottom and the top content of any file, we use tools such as head and tail. But what if we need to view a particular section in the middle of any file? Here we’ll discuss, how to use SED command to view a section of any file.
1 – Viewing a file from x to y range –
Syntax: sed -n ‘x,yp’ filename
Example :
[root@rhel7 ~]# sed -n '2,5p' a.txt
2 – View the entire file except the given range –
Syntax: sed ‘x,yd’ filename
Example :
[root@rhel7 ~]# sed '2,4d' a.txt
3 – Print nth line of the file –
Syntax: sed -n ‘address’p filename
Example :
[root@rhel7 ~]# sed -n '4'p a.txt
4 – Print lines from xth line to yth line.
Syntax: sed -n ‘x,y’p filename
Example :
[root@rhel7 ~]# sed -n '4,6'p a.txt
5 – Print only the last line –
Syntax: sed -n ‘$’p filename
6 – Print from nth line to end of file –
Syntax: sed -n ‘n,$p’ filename
Example :
[root@rhel7 ~]# sed -n '3,$'p a.txt
Pattern Printing
7 – Print the line only which matches the pattern –
Syntax: sed -n /pattern/p filename
Example :
[root@rhel7 ~]# sed -n /every/p a.txt
8 – Print lines which matches the pattern i.e from input to xth line.
Syntax: sed -n ‘/pattern/,xp’ filename
Example :
[root@rhel7 ~]# sed -n '/everyone/,5p' a.txt
Following prints lines which matches the pattern, 3rd line matches the pattern “everyone”, so it prints from 3rd line to 5th line. Use $ in place of 5, if want to print the file till end.
9 – Prints lines from the xth line of the input, up-to the line which matches the pattern. If the pattern doesn’t found then it prints up-to end of the file.
Syntax: sed -n ‘x,/pattern/p’ filename
Example :
sed -n '1,/everyone/p' a.txt
10 – Print the lines which matches the pattern up-to the next xth lines –
Syntax: sed -n ‘/pattern/,+xp’ filename
Example :
sed -n '/learn/,+2p' a.txt
# Replacement with the sed command
1 – Change the first occurrence of the pattern –
[root@rhel7 ~]# sed 's/life/leaves/' a.txt
2 – Replacing the nth occurrence of a pattern in a line –
Syntax: sed ‘s/old_pattern/new_pattern/n’ filename
Example :
[root@rhel7 ~]# sed 's/to/two/2' a.txt
We wrote “2” because we replaces the second occurrence. Likewise you can use 3, 4 etc according to need.
3 – Replacing all the occurrence of the pattern in a line.
[root@rhel7 ~]# sed 's/life/learn/g' a.txt
4 – Replace pattern from nth occurrence to all occurrences in a line.
Syntax: sed ‘s/old_pattern/new_pattern/ng’ filename
Example :
[root@rhel7 ~]# sed 's/to/TWO/2g' a.txt
Note – This sed command replaces the second, third, etc occurrences of pattern “to” with “TWO” in a line.
If you wish to print only the replaced lines, then use “-n” option along with “/p” print flag to display only the replaced lines –
[root@rhel7 ~]# sed -n 's/to/TWO/p' a.txt
And if you wish to print the replaced lines twice, then only use “/p” print flag without “-n” option-
[root@rhel7 ~]# sed 's/to/TWO/p' a.txt
5 – Replacing pattern on a specific line number. Here, “m” is the line number.
Syntax: sed ‘m s/old_pattern/new_pattern/’ filename
Example :
[root@rhel7 ~]# sed '3 s/every/each/' a.txt
If you wish to print only the replaced lines –
[root@rhel7 ~]# sed -n '3 s/every/each/p' a.txt
6 – Replace string on a defined range of lines –
Syntax: sed ‘x,y s/old_pattern/new_pattern/’ filename
where,
x = starting line number
and y = ending line number
Example :
[root@rhel7 ~]# sed '2,5 s/to/TWO/' a.txt
Note – $ can be used in place of “y” if we wish to change the pattern up-to last line in the file.
Example :
[root@rhel7 ~]# sed '2,$ s/to/TWO/' a.txt
7 – If you wish to replace pattern in order to ignore character case (beginning with uppercase or lowercase), then there are two ways to replace such patterns –
First, By using “/i” print flag –
Syntax: sed ‘s/old_pattern/new_pattern/i’ filename
Example :
[root@rhel7 ~]# sed 's/life/Love/i' a.txt
Second, By using regular expressions –
[root@rhel7 ~]# sed 's/[Ll]ife/Love/g' a.txt
8 – To replace multiple spaces with a single space –
[root@rhel7 clang]# sed 's/ */ /g' filename
9 – Replace one pattern followed by the another pattern –
Syntax: sed ‘/followed_pattern/ s/old_pattern/new_pattern/’ filename
Example :
[root@rhel7 ~]# sed '/is/ s/live/love/' a.txt
10 – Replace a pattern with other except in the nth line.
Syntax: sed ‘n!s/old_pattern/new_pattern/’ filename
Example :
[root@rhel7 ~]# sed -i '5!s/life/love/' a.txt
- tar - create or extract compressed archive files
- gzip - compress files
- ssh - connect to a remote server securely
- ifconfig - display or configure network interfaces
- netstat - display network connection information
- ps - display information about running processes
- kill - terminate a process
- useradd - add a new user to the system
- userdel - delete a user from the system
- su - switch user to become another user
- sudo - execute a command as another user or with elevated privileges
- uptime - display system uptime and load average
- df - display disk space usage
- du - display disk usage by file or directory
- mount - mount a file system
- umount - unmount a file system
- finger - displays all the information about user
- locate - locate any file on the system
- *SORT command is used to sort a file, arranging the records in a particular order. By default, the sort command sorts file assuming the contents are ASCII. Using options in the sort command can also be used to sort numerically.
- SORT command sorts the contents of a text file, line by line.
- sort is a standard command-line program that prints the lines of its input or concatenation of all files listed in its argument list in sorted order.
- The sort command is a command-line utility for sorting lines of text files. It supports sorting alphabetically, in reverse order, by number, by month, and can also remove duplicates.
- The sort command can also sort by items not at the beginning of the line, ignore case sensitivity, and return whether a file is sorted or not. Sorting is done based on one or more sort keys extracted from each line of input.
- By default, the entire input is taken as the sort key. Blank space is the default field separator.
The sort command follows these features as stated below:
- Lines starting with a number will appear before lines starting with a letter.
- Lines starting with a letter that appears earlier in the alphabet will appear before lines starting with a letter that appears later in the alphabet.
- Lines starting with a uppercase letter will appear before lines starting with the same letter in lowercase.
Examples
Suppose you create a data file with name file.txt:
Command :
$ cat > file.txt
abhishek
chitransh
satish
rajan
naveen
divyam
harsh
Sorting a file: Now use the sort command
Syntax :
$ sort filename.txt
Command:
$ sort file.txt

Output :
abhishek
chitransh
divyam
harsh
naveen
rajan
satish
Note: This command does not actually change the input file, i.e. file.txt.
Sort function with mix file i.e. uppercase and lower case: When we have a mix file with both uppercase and lowercase letters then first the upper case letters would be sorted following with the lower case letters.
Example:
Create a file mix.txt
Command :
$ cat > mix.txt
abc
apple
BALL
Abc
bat
Now use the sort command
Command :
$ sort mix.txt
Output :
Abc
BALL
abc
apple
bat
Options with sort function:
1. -o Option: Unix also provides us with special facilities like if you want to write the output to a new file, output.txt, redirects the output like this or you can also use the built-in sort option -o, which allows you to specify an output file.
Using the -o option is functionally the same as redirecting the output to a file.
Note: Neither one has an advantage over the other.
Example: The input file is the same as mentioned above.
Syntax:
$ sort inputfile.txt > filename.txt
$ sort -o filename.txt inputfile.txt
Command:
$ sort file.txt > output.txt
$ sort -o output.txt file.txt
$ cat output.txt

Output :
abhishek
chitransh
divyam
harsh
naveen
rajan
satish
2. -r Option: Sorting In Reverse Order: You can perform a reverse-order sort using the -r flag. the -r flag is an option of the sort command which sorts the input file in reverse order i.e. descending order by default.
Example: The input file is the same as mentioned above.
Syntax :
$ sort -r inputfile.txt
Command :
$ sort -r file.txt
Output :
satish
rajan
naveen
harsh
divyam
chitransh
abhishek
3. -n Option: To sort a file numerically used –n option. -n option is also predefined in Unix as the above options are. This option is used to sort the file with numeric data present inside.
Example :
Let us consider a file with numbers:
Command :
$ cat > file1.txt
50
39
15
89
200
Syntax:
$ sort -n filename.txt
Command :
$ sort -n file1.txt
Output :
15
39
50
89
200
4. -nr option: To sort a file with numeric data in reverse order we can use the combination of two options as stated below.
Example: The numeric file is the same as above.
Syntax :
$ sort -nr filename.txt
Command :
$ sort -nr file1.txt
Output :
200
89
50
39
15
5. -k Option: Unix provides the feature of sorting a table on the basis of any column number by using -k option.
Use the -k option to sort on a certain column. For example, use “-k 2” to sort on the second column.
Example :
Let us create a table with 2 columns
$ cat > employee.txt
manager  5000
clerk    4000
employee  6000
peon     4500
director 9000
guard     3000
Syntax :
$ sort -k filename.txt
Command :
$ sort -k 2n employee.txt
guard    3000
clerk    4000
peon     4500
manager  5000
employee 6000
director 9000
6. -c option: This option is used to check if the file given is already sorted or not & checks if a file is already sorted pass the -c option to sort. This will write to standard output if there are lines that are out of order. The sort tool can be used to understand if this file is sorted and which lines are out of order
Example :
Suppose a file exists with a list of cars called cars.txt.
Audi
Cadillac
BMW
Dodge
Syntax :
$ sort -c filename.txt
Command :
$ sort -c cars.txt
Output :
sort: cars.txt:3: disorder: BMW
 Note : If there is no output then the file is considered to be already sorted
7. -u option: To sort and remove duplicates pass the -u option to sort. This will write a sorted list to standard output and remove duplicates.
This option is helpful as the duplicates being removed give us a redundant file.
Example: Suppose a file exists with a list of cars called cars.txt.
Audi
BMW
Cadillac
BMW
Dodge
Syntax :
$ sort -u filename.txt
Command :
$ sort -u cars.txt
$ cat cars.txt
Output :
Audi
BMW
Cadillac
Dodge
8. -M Option: To sort by month pass the -M option to sort. This will write a sorted list to standard output ordered by month name.
Example:
Suppose the following file exists and is saved as months.txt
$ cat > months.txt
February
January
March
August
September

Syntax :
$ sort -M filename.txt
Using The -M option with sort allows us to order this file.
Command :
$ sort -M months.txt
$ cat months.txt
Output :
January
February
March
August
September
Application and uses of sort command:
- It can sort any type of file be it table file text file numeric file and so on.
- Sorting can be directly implemented from one file to another without the present work being hampered.
- Sorting of table files on the basis of columns has been made way simpler and easier.
- So many options are available for sorting in all possible ways.
- The most beneficial use is that a particular data file can be used many times as no change is made in the input file provided.
- Original data is always safe and not hampered.
CUT:-
The cut command in UNIX is a command for cutting out the sections from each line of files and writing the result to standard output. It can be used to cut parts of a line by byte position, character and field. Basically the cut command slices a line and extracts the text. It is necessary to specify option with command otherwise it gives error. If more than one file name is provided then data from each file is not precedes by its file name.
Syntax:
cut OPTION... [FILE]...
Let us consider two files having name state.txt and capital.txt contains 5 names of the Indian states and capitals respectively.
$ cat state.txt
Andhra Pradesh
Arunachal Pradesh
Assam
Bihar
Chhattisgarh
Without any option specified it displays error.
$ cut state.txt
cut: you must specify a list of bytes, characters, or fields
Try 'cut --help' for more information.
Options and their Description with examples:
1. -b(byte): To extract the specific bytes, you need to follow -b option with the list of byte numbers separated by comma. Range of bytes can also be specified using the hyphen(-). It is necessary to specify list of byte numbers otherwise it gives error. Tabs and backspaces are treated like as a character of 1 byte.
List without ranges
$ cut -b 1,2,3 state.txt
And
Aru
Ass
Bih
Chh

List with ranges
$ cut -b 1-3,5-7 state.txt
Andra
Aruach
Assm
Bihr
Chhtti
It uses a special form for selecting bytes from beginning upto the end of the line:
In this, 1- indicate from 1st byte to end byte of a line
$ cut -b 1- state.txt
Andhra Pradesh
Arunachal Pradesh
Assam
Bihar
Chhattisgarh

In this, -3 indicate from 1st byte to 3rd byte of a line
$ cut -b -3 state.txt
And
Aru
Ass
Bih
Chh
2. -c (column): To cut by character use the -c option. This selects the characters given to the -c option. This can be a list of numbers separated comma or a range of numbers separated by hyphen(-). Tabs and backspaces are treated as a character. It is necessary to specify list of character numbers otherwise it gives error with this option.
Syntax:
$cut -c [(k)-(n)/(k),(n)/(n)] filename
Here,k denotes the starting position of the character and n denotes the ending position of the character in each line, if k and n are separated by “-” otherwise they are only the position of character in each line from the file taken as an input.
$ cut -c 2,5,7 state.txt
nr
rah
sm
ir
hti
Above cut command prints second, fifth and seventh character from each line of the file.
$ cut -c 1-7 state.txt
Andhra
Arunach
Assam
Bihar
Chhatti
Above cut command prints first seven characters of each line from the file.
Cut uses a special form for selecting characters from beginning upto the end of the line:
$ cut -c 1- state.txt
Andhra Pradesh
Arunachal Pradesh
Assam
Bihar
Chhattisgarh

Above command prints starting from first character to end. Here in command only starting
position is specified and the ending position is omitted.

$ cut -c -5 state.txt
Andhr
Aruna
Assam
Bihar
Chhat

Above command prints starting position to the fifth character. Here the starting position
is omitted and the ending position is specified.
3. -f (field): -c option is useful for fixed-length lines. Most unix files doesn’t have fixed-length lines. To extract the useful information you need to cut by fields rather than columns. List of the fields number specified must be separated by comma. Ranges are not described with -f option. cut uses tab as a default field delimiter but can also work with other delimiter by using -d option.
Note: Space is not considered as delimiter in UNIX.
Syntax:
$cut -d "delimiter" -f (field number) file.txt
Like in the file state.txt fields are separated by space if -d option is not used then it prints whole line:
$ cut -f 1 state.txt
Andhra Pradesh
Arunachal Pradesh
Assam
Bihar
Chhattisgarh
If -d option is used then it considered space as a field separator or delimiter:
$ cut -d " " -f 1 state.txt
Andhra
Arunachal
Assam
Bihar
Chhattisgarh
Command prints field from first to fourth of each line from the file.
Command:
$ cut -d " " -f 1-4 state.txt
Output:
Andhra Pradesh
Arunachal Pradesh
Assam
Bihar
Chhattisgarh
4. –complement: As the name suggests it complement the output. This option can be used in the combination with other options either with -f or with -c.
$ cut --complement -d " " -f 1 state.txt
Pradesh
Pradesh
Assam
Bihar
Chhattisgarh

$ cut --complement -c 5 state.txt
Andha Pradesh
Arunchal Pradesh
Assa
Biha
Chhattisgarh
5. –output-delimiter: By default the output delimiter is same as input delimiter that we specify in the cut with -d option. To change the output delimiter use the option –output-delimiter=”delimiter”.
$ cut -d " " -f 1,2 state.txt --output-delimiter='%'
Andhra%Pradesh
Arunachal%Pradesh
Assam
Bihar
Chhattisgarh
Here cut command changes delimiter(%) in the standard output between the fields which is specified by using -f option .
6. –version: This option is used to display the version of cut which is currently running on your system.
$ cut --version
cut (GNU coreutils) 8.26
Packaged by Cygwin (8.26-2)
Copyright (C) 2016 Free Software Foundation, Inc.
License GPLv3+: GNU GPL version 3 or later .
This is free software: you are free to change and redistribute it.
There is NO WARRANTY, to the extent permitted by law.

Written by David M. Ihnat, David MacKenzie, and Jim Meyering.
Applications of cut Command
1. How to use tail with pipes(|): The cut command can be piped with many other commands of the unix. In the following example output of the cat command is given as input to the cut command with -f option to sort the state names coming from file state.txt in the reverse order.
$ cat state.txt | cut -d ' ' -f 1 | sort -r
Chhattisgarh
Bihar
Assam
Arunachal
Andhra
It can also be piped with one or more filters for additional processing. Like in the following example, we are using cat, head and cut command and whose output is stored in the file name list.txt using directive(>).
$ cat state.txt | head -n 3 | cut -d ' ' -f 1 > list.txt

$ cat list.txt
Andhra
Arunachal
Assam
UNAME:-The command ‘uname‘ displays the information about the system.
Syntax:
uname [OPTION]
- ifconfig - display or configure network interfaces
- netstat - display network connection information
- ps - display information about running processes
- kill - terminate a process
- useradd - add a new user to the system
- userdel - delete a user from the system
- su - switch user to become another user
- sudo - execute a command as another user or with elevated privileges
- uptime - display system uptime and load average
- df - display disk space usage
- du - display disk usage by file or directory
- mount - mount a file system
- umount - unmount a file system
- finger - displays all the information about user
- locate - locate any file on the system
- *SORT command is used to sort a file, arranging the records in a particular order. By default, the sort command sorts file assuming the contents are ASCII. Using options in the sort command can also be used to sort numerically.
- SORT command sorts the contents of a text file, line by line.
- sort is a standard command-line program that prints the lines of its input or concatenation of all files listed in its argument list in sorted order.
- The sort command is a command-line utility for sorting lines of text files. It supports sorting alphabetically, in reverse order, by number, by month, and can also remove duplicates.
- The sort command can also sort by items not at the beginning of the line, ignore case sensitivity, and return whether a file is sorted or not. Sorting is done based on one or more sort keys extracted from each line of input.
- By default, the entire input is taken as the sort key. Blank space is the default field separator.
The sort command follows these features as stated below:
- Lines starting with a number will appear before lines starting with a letter.
- Lines starting with a letter that appears earlier in the alphabet will appear before lines starting with a letter that appears later in the alphabet.
- Lines starting with a uppercase letter will appear before lines starting with the same letter in lowercase.
Examples
Suppose you create a data file with name file.txt:
Command : $ cat > file.txt abhishek chitransh satish rajan naveen divyam harsh
Sorting a file: Now use the sort command
Syntax :
$ sort filename.txt
Command: $ sort file.txt Output : abhishek chitransh divyam harsh naveen rajan satish
Note: This command does not actually change the input file, i.e. file.txt.
Sort function with mix file i.e. uppercase and lower case: When we have a mix file with both uppercase and lowercase letters then first the upper case letters would be sorted following with the lower case letters.
Example:
Create a file mix.txt
Command : $ cat > mix.txt abc apple BALL Abc bat
Now use the sort command
Command : $ sort mix.txt Output : Abc BALL abc apple bat
Options with sort function:
1. -o Option: Unix also provides us with special facilities like if you want to write the output to a new file, output.txt, redirects the output like this or you can also use the built-in sort option -o, which allows you to specify an output file.
Using the -o option is functionally the same as redirecting the output to a file.
Note: Neither one has an advantage over the other.
Example: The input file is the same as mentioned above.
Syntax:
$ sort inputfile.txt > filename.txt $ sort -o filename.txt inputfile.txt
Command: $ sort file.txt > output.txt $ sort -o output.txt file.txt $ cat output.txt Output : abhishek chitransh divyam harsh naveen rajan satish
2. -r Option: Sorting In Reverse Order: You can perform a reverse-order sort using the -r flag. the -r flag is an option of the sort command which sorts the input file in reverse order i.e. descending order by default.
Example: The input file is the same as mentioned above.
Syntax :
$ sort -r inputfile.txt
Command : $ sort -r file.txt Output : satish rajan naveen harsh divyam chitransh abhishek
3. -n Option: To sort a file numerically used –n option. -n option is also predefined in Unix as the above options are. This option is used to sort the file with numeric data present inside.
Example :
Let us consider a file with numbers:
Command : $ cat > file1.txt 50 39 15 89 200
Syntax:
$ sort -n filename.txt
Command : $ sort -n file1.txt Output : 15 39 50 89 200
4. -nr option: To sort a file with numeric data in reverse order we can use the combination of two options as stated below.
Example: The numeric file is the same as above.
Syntax :
$ sort -nr filename.txt
Command : $ sort -nr file1.txt Output : 200 89 50 39 15
5. -k Option: Unix provides the feature of sorting a table on the basis of any column number by using -k option.
Use the -k option to sort on a certain column. For example, use “-k 2” to sort on the second column.
Example :
Let us create a table with 2 columns
$ cat > employee.txt manager 5000 clerk 4000 employee 6000 peon 4500 director 9000 guard 3000
Syntax :
$ sort -k filename.txt
Command : $ sort -k 2n employee.txt guard 3000 clerk 4000 peon 4500 manager 5000 employee 6000 director 9000
6. -c option: This option is used to check if the file given is already sorted or not & checks if a file is already sorted pass the -c option to sort. This will write to standard output if there are lines that are out of order. The sort tool can be used to understand if this file is sorted and which lines are out of order
Example :
Suppose a file exists with a list of cars called cars.txt.
Audi Cadillac BMW Dodge
Syntax :
$ sort -c filename.txt
Command : $ sort -c cars.txt Output : sort: cars.txt:3: disorder: BMW Note : If there is no output then the file is considered to be already sorted
7. -u option: To sort and remove duplicates pass the -u option to sort. This will write a sorted list to standard output and remove duplicates.
This option is helpful as the duplicates being removed give us a redundant file.
Example: Suppose a file exists with a list of cars called cars.txt.
Audi BMW Cadillac BMW Dodge
Syntax :
$ sort -u filename.txt
Command : $ sort -u cars.txt $ cat cars.txt Output : Audi BMW Cadillac Dodge
8. -M Option: To sort by month pass the -M option to sort. This will write a sorted list to standard output ordered by month name.
Example:
Suppose the following file exists and is saved as months.txt
$ cat > months.txt
February January March August September Syntax :
$ sort -M filename.txt
Using The -M option with sort allows us to order this file.
Command : $ sort -M months.txt $ cat months.txt Output : January February March August September
Application and uses of sort command:
- It can sort any type of file be it table file text file numeric file and so on.
- Sorting can be directly implemented from one file to another without the present work being hampered.
- Sorting of table files on the basis of columns has been made way simpler and easier.
- So many options are available for sorting in all possible ways.
- The most beneficial use is that a particular data file can be used many times as no change is made in the input file provided.
- Original data is always safe and not hampered.
The cut command in UNIX is a command for cutting out the sections from each line of files and writing the result to standard output. It can be used to cut parts of a line by byte position, character and field. Basically the cut command slices a line and extracts the text. It is necessary to specify option with command otherwise it gives error. If more than one file name is provided then data from each file is not precedes by its file name.
Syntax:
cut OPTION... [FILE]...
Let us consider two files having name state.txt and capital.txt contains 5 names of the Indian states and capitals respectively.
$ cat state.txt Andhra Pradesh Arunachal Pradesh Assam Bihar Chhattisgarh
Without any option specified it displays error.
$ cut state.txt cut: you must specify a list of bytes, characters, or fields Try 'cut --help' for more information.
Options and their Description with examples:
1. -b(byte): To extract the specific bytes, you need to follow -b option with the list of byte numbers separated by comma. Range of bytes can also be specified using the hyphen(-). It is necessary to specify list of byte numbers otherwise it gives error. Tabs and backspaces are treated like as a character of 1 byte.
List without ranges $ cut -b 1,2,3 state.txt And Aru Ass Bih Chh List with ranges $ cut -b 1-3,5-7 state.txt Andra Aruach Assm Bihr Chhtti
It uses a special form for selecting bytes from beginning upto the end of the line:
In this, 1- indicate from 1st byte to end byte of a line $ cut -b 1- state.txt Andhra Pradesh Arunachal Pradesh Assam Bihar Chhattisgarh In this, -3 indicate from 1st byte to 3rd byte of a line $ cut -b -3 state.txt And Aru Ass Bih Chh
2. -c (column): To cut by character use the -c option. This selects the characters given to the -c option. This can be a list of numbers separated comma or a range of numbers separated by hyphen(-). Tabs and backspaces are treated as a character. It is necessary to specify list of character numbers otherwise it gives error with this option.
Syntax:
$cut -c [(k)-(n)/(k),(n)/(n)] filename
Here,k denotes the starting position of the character and n denotes the ending position of the character in each line, if k and n are separated by “-” otherwise they are only the position of character in each line from the file taken as an input.
$ cut -c 2,5,7 state.txt nr rah sm ir hti
Above cut command prints second, fifth and seventh character from each line of the file.
$ cut -c 1-7 state.txt Andhra Arunach Assam Bihar Chhatti
Above cut command prints first seven characters of each line from the file.
Cut uses a special form for selecting characters from beginning upto the end of the line:
$ cut -c 1- state.txt Andhra Pradesh Arunachal Pradesh Assam Bihar Chhattisgarh Above command prints starting from first character to end. Here in command only starting position is specified and the ending position is omitted. $ cut -c -5 state.txt Andhr Aruna Assam Bihar Chhat Above command prints starting position to the fifth character. Here the starting position is omitted and the ending position is specified.
3. -f (field): -c option is useful for fixed-length lines. Most unix files doesn’t have fixed-length lines. To extract the useful information you need to cut by fields rather than columns. List of the fields number specified must be separated by comma. Ranges are not described with -f option. cut uses tab as a default field delimiter but can also work with other delimiter by using -d option.
Note: Space is not considered as delimiter in UNIX.
Syntax:
$cut -d "delimiter" -f (field number) file.txt
Like in the file state.txt fields are separated by space if -d option is not used then it prints whole line:
$ cut -f 1 state.txt Andhra Pradesh Arunachal Pradesh Assam Bihar Chhattisgarh
If -d option is used then it considered space as a field separator or delimiter:
$ cut -d " " -f 1 state.txt Andhra Arunachal Assam Bihar Chhattisgarh
Command prints field from first to fourth of each line from the file. Command: $ cut -d " " -f 1-4 state.txt Output: Andhra Pradesh Arunachal Pradesh Assam Bihar Chhattisgarh
4. –complement: As the name suggests it complement the output. This option can be used in the combination with other options either with -f or with -c.
$ cut --complement -d " " -f 1 state.txt Pradesh Pradesh Assam Bihar Chhattisgarh $ cut --complement -c 5 state.txt Andha Pradesh Arunchal Pradesh Assa Biha Chhattisgarh
5. –output-delimiter: By default the output delimiter is same as input delimiter that we specify in the cut with -d option. To change the output delimiter use the option –output-delimiter=”delimiter”.
$ cut -d " " -f 1,2 state.txt --output-delimiter='%' Andhra%Pradesh Arunachal%Pradesh Assam Bihar Chhattisgarh
Here cut command changes delimiter(%) in the standard output between the fields which is specified by using -f option .
6. –version: This option is used to display the version of cut which is currently running on your system.
$ cut --version cut (GNU coreutils) 8.26 Packaged by Cygwin (8.26-2) Copyright (C) 2016 Free Software Foundation, Inc. License GPLv3+: GNU GPL version 3 or later . This is free software: you are free to change and redistribute it. There is NO WARRANTY, to the extent permitted by law. Written by David M. Ihnat, David MacKenzie, and Jim Meyering.
Applications of cut Command
1. How to use tail with pipes(|): The cut command can be piped with many other commands of the unix. In the following example output of the cat command is given as input to the cut command with -f option to sort the state names coming from file state.txt in the reverse order.
$ cat state.txt | cut -d ' ' -f 1 | sort -r Chhattisgarh Bihar Assam Arunachal Andhra
It can also be piped with one or more filters for additional processing. Like in the following example, we are using cat, head and cut command and whose output is stored in the file name list.txt using directive(>).
$ cat state.txt | head -n 3 | cut -d ' ' -f 1 > list.txt $ cat list.txt Andhra Arunachal Assam
UNAME:-The command ‘uname‘ displays the information about the system.
Syntax:
uname [OPTION]
Options and Examples
1. -a option: It prints all the system information in the following order: Kernel name, network node hostname, kernel release date, kernel version, machine hardware name, hardware platform, operating system
.
Syntax:
$uname -a
Output:
The command ‘uname‘ displays the information about the system.
Syntax:
uname [OPTION]
1. -a option: It prints all the system information in the following order: Kernel name, network node hostname, kernel release date, kernel version, machine hardware name, hardware platform, operating system
.
Syntax:$uname -aOutput:
The command ‘uname‘ displays the information about the system.
Syntax:
uname [OPTION]
Options and Examples
1. -a option: It prints all the system information in the following order: Kernel name, network node hostname, kernel release date, kernel version, machine hardware name, hardware platform, operating system
.
Syntax:
$uname -a
Output:

2. -s option: It prints the kernel name.
Syntax:
$uname -s
Output:

-v option: It prints the version of the current kernel.
Syntax:
$uname -v
-p option: It prints the type of the processor.
Syntax:
$uname -p
-o option: It prints the name of the operating system.
Syntax :
$uname -o
User Account
Management:
Following
are the basic user account management commands
·
useradd
To create a new user
in Linux. A different options can be
used to modify userId, home directory etc.
·
userdel
This command is used
to delete the user. Please note this
command alone will not delete the user home directory. You will have to use option –r to delete user
home director
·
groupadd
Creates a new group
·
groupdel
Removes an existing
group
·
usermod
Modify user
attributes such as user home directory, user group, user ID etc.
PS:-
Shows the processes for the current shell
Linux provides us a utility called ps for viewing information related with the processes on a system which stands as abbreviation for “Process Status”. ps command is used to list the currently running processes and their PIDs along with some other information depends on different options. It reads the process information from the virtual files in /proc file-system. /proc contains virtual files, this is the reason it’s referred as a virtual file system.
ps provides numerous options for manipulating the output according to our need.
Crontab:-
The crontab is a list of commands that you want to run on a regular schedule, and also the name of the command used to manage that list. Crontab stands for “cron table, ” because it uses the job scheduler cron to execute tasks; cron itself is named after “chronos, ” the Greek word for time.cron is the system process which will automatically perform tasks for you according to a set schedule. The schedule is called the crontab, which is also the name of the program used to edit that schedule. Linux Crontab Format
MIN HOUR DOM MON DOW CMD
Crontab Fields and Allowed Ranges (Linux Crontab Syntax)
Field Description Allowed Value
MIN Minute field 0 to 59
HOUR Hour field 0 to 23
DOM Day of Month 1-31
MON Month field 1-12
DOW Day Of Week 0-6
CMD Command Any command to be executed.
Examples of Cron jobs 1. Scheduling a Job For a Specific Time The basic usage of cron is to execute a job in a specific time as shown below. This will execute the Full backup shell script (full-backup) on 10th June 08:30 AM. The time field uses 24 hours format. So, for 8 AM use 8, and for 8 PM use 20.
30 08 10 06 * /home/maverick/full-backup
30 – 30th Minute 08 – 08 AM 10 – 10th Day 06 – 6th Month (June) * – Every day of the week 2.To view the Crontab entries
- View Current Logged-In User’s Crontab entries : To view your crontab entries type crontab -l from your unix account.

- View Root Crontab entries : Login as root user (su – root) and do crontab -l.

- To view crontab entries of other Linux users : Login to root and use -u {username} -l.
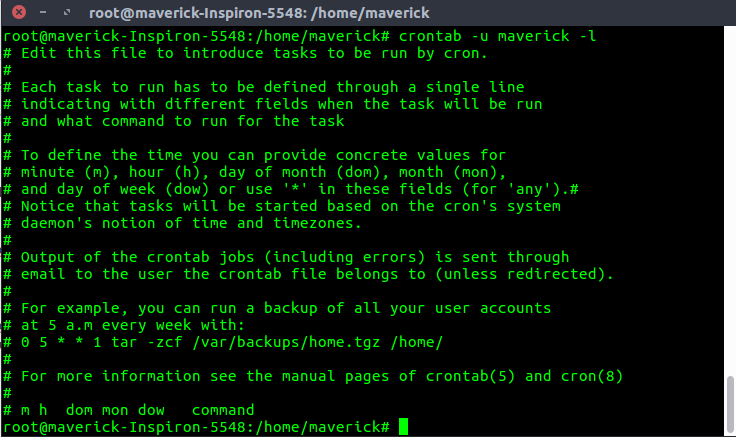
3.To edit Crontab Entries Edit Current Logged-In User’s Crontab entries.To edit a crontab entries, use crontab -e. By default this will edit the current logged-in users crontab. 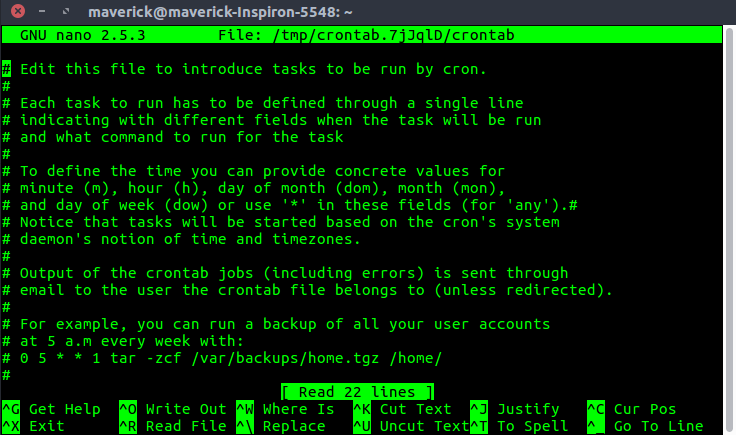 4.To schedule a job for every minute using Cron. Ideally you may not have a requirement to schedule a job every minute. But understanding this example will help you understand the other examples.
* * * * * CMD
The * means all the possible unit — i.e every minute of every hour through out the year. More than using this * directly, you will find it very useful in the following cases. When you specify */5 in minute field means every 5 minutes. When you specify 0-10/2 in minute field mean every 2 minutes in the first 10 minute. Thus the above convention can be used for all the other 4 fields. 5.To schedule a job for more than one time (e.g. Twice a Day) The following script take a incremental backup twice a day every day. This example executes the specified incremental backup shell script (incremental-backup) at 11:00 and 16:00 on every day. The comma separated value in a field specifies that the command needs to be executed in all the mentioned time.
00 11, 16 * * * /home/maverick/bin/incremental-backup
00 – 0th Minute (Top of the hour) 11, 16 – 11 AM and 4 PM * – Every day * – Every month * – Every day of the week 6.To schedule a job for certain range of time (e.g. Only on Weekdays) If you wanted a job to be scheduled for every hour with in a specific range of time then use the following.
- Cron Job everyday during working hours : This example checks the status of the database everyday (including weekends) during the working hours 9 a.m – 6 p.m
00 09-18 * * * /home/maverick/bin/check-db-status
- 00 – 0th Minute (Top of the hour) 09-18 – 9 am, 10 am, 11 am, 12 am, 1 pm, 2 pm, 3 pm, 4 pm, 5 pm, 6 pm * – Every day * – Every month * – Every day of the week
- Cron Job every weekday during working hours : This example checks the status of the database every weekday (i.e excluding Sat and Sun) during the working hours 9 a.m – 6 p.m.
00 09-18 * * 1-5 /home/maverick/bin/check-db-status
- 00 – 0th Minute (Top of the hour) 09-18 – 9 am, 10 am, 11 am, 12 am, 1 pm, 2 pm, 3 pm, 4 pm, 5 pm, 6 pm * – Every day * – Every month 1-5 -Mon, Tue, Wed, Thu and Fri (Every Weekday)
7.To schedule a background Cron job for every 10 minutes. Use the following, if you want to check the disk space every 10 minutes.
*/10 * * * * /home/maverick/check-disk-space
It executes the specified command check-disk-space every 10 minutes through out the year. But you may have a requirement of executing the command only during certain hours or vice versa. The above examples shows how to do those things.Instead of specifying values in the 5 fields, we can specify it using a single keyword as mentioned below. There are special cases in which instead of the above 5 fields you can use @ followed by a keyword — such as reboot, midnight, yearly, hourly. Cron special keywords and its meaning
Keyword    Equivalent
@yearly    0 0 1 1 *
@daily     0 0 * * *
@hourly    0 * * * *
@reboot    Run at startup.
8.To schedule a job for first minute of every year using @yearly If you want a job to be executed on the first minute of every year, then you can use the @yearly cron keyword as shown below.This will execute the system annual maintenance using annual-maintenance shell script at 00:00 on Jan 1st for every year.
@yearly /home/maverick/bin/annual-maintenance
9.To schedule a Cron job beginning of every month using @monthly It is as similar as the @yearly as above. But executes the command monthly once using @monthly cron keyword.This will execute the shell script tape-backup at 00:00 on 1st of every month.
@monthly /home/maverick/bin/tape-backup
10.To schedule a background job every day using @daily Using the @daily cron keyword, this will do a daily log file cleanup using cleanup-logs shell script at 00:00 on every day.
@daily /home/maverick/bin/cleanup-logs "day started"
11.To execute a linux command after every reboot using @reboot Using the @reboot cron keyword, this will execute the specified command once after the machine got booted every time.
@reboot CMD
TOP:-
- The top ( t able o f p rocesses) command shows a real-time view of running processes in Linux and displays kernel -managed tasks. The command also provides a system information summary that shows resource utilization, including CPU and memory usage. In this tutorial, you will learn to use the top command in Linux. A system running Linux.
df command:-The df command can be run by any user. Like many Linux commands, dfuses the following structure: The dfcommand primarily checks disk usage on a mounted filesystem. If you don't include a file name, the output shows the space available on all currently mounted filesystems. Disk space is shown in 1K blocks by defaultdisk free also known as `df`, which is a powerful utility that provides valuable information on disk space utilization. The df command displays information about file system disk space usage on the mounted file system. This command retrieves the information from `/proc/mounts` or `/etc/mtab`. By default, df command shows disk space in Kilobytes (KB) and uses the SI unit suffixes (e.g, M for megabytes, G for gigabytes) for clarity.
1. -a option: It prints all the system information in the following order: Kernel name, network node hostname, kernel release date, kernel version, machine hardware name, hardware platform, operating system
.
Syntax:$uname -aOutput:
2. -s option: It prints the kernel name.
Syntax:
$uname -sOutput:
-v option: It prints the version of the current kernel.
Syntax:
$uname -v-p option: It prints the type of the processor.
Syntax:
$uname -p-o option: It prints the name of the operating system.
Syntax :
$uname -oUser Account Management:
Following are the basic user account management commands
· useradd
To create a new user in Linux. A different options can be used to modify userId, home directory etc.
· userdel
This command is used to delete the user. Please note this command alone will not delete the user home directory. You will have to use option –r to delete user home director
· groupadd
Creates a new group
· groupdel
Removes an existing group
· usermod
Modify user attributes such as user home directory, user group, user ID etc.
PS:- Shows the processes for the current shell
Linux provides us a utility called ps for viewing information related with the processes on a system which stands as abbreviation for “Process Status”. ps command is used to list the currently running processes and their PIDs along with some other information depends on different options. It reads the process information from the virtual files in /proc file-system. /proc contains virtual files, this is the reason it’s referred as a virtual file system.
ps provides numerous options for manipulating the output according to our need.
Crontab:-
The crontab is a list of commands that you want to run on a regular schedule, and also the name of the command used to manage that list. Crontab stands for “cron table, ” because it uses the job scheduler cron to execute tasks; cron itself is named after “chronos, ” the Greek word for time.cron is the system process which will automatically perform tasks for you according to a set schedule. The schedule is called the crontab, which is also the name of the program used to edit that schedule. Linux Crontab Format
MIN HOUR DOM MON DOW CMDCrontab Fields and Allowed Ranges (Linux Crontab Syntax)
Field Description Allowed Value MIN Minute field 0 to 59 HOUR Hour field 0 to 23 DOM Day of Month 1-31 MON Month field 1-12 DOW Day Of Week 0-6 CMD Command Any command to be executed.Examples of Cron jobs 1. Scheduling a Job For a Specific Time The basic usage of cron is to execute a job in a specific time as shown below. This will execute the Full backup shell script (full-backup) on 10th June 08:30 AM. The time field uses 24 hours format. So, for 8 AM use 8, and for 8 PM use 20.
30 08 10 06 * /home/maverick/full-backup30 – 30th Minute 08 – 08 AM 10 – 10th Day 06 – 6th Month (June) * – Every day of the week 2.To view the Crontab entries
- View Current Logged-In User’s Crontab entries : To view your crontab entries type crontab -l from your unix account.
- View Root Crontab entries : Login as root user (su – root) and do crontab -l.
- To view crontab entries of other Linux users : Login to root and use -u {username} -l.
3.To edit Crontab Entries Edit Current Logged-In User’s Crontab entries.To edit a crontab entries, use crontab -e. By default this will edit the current logged-in users crontab. 4.To schedule a job for every minute using Cron. Ideally you may not have a requirement to schedule a job every minute. But understanding this example will help you understand the other examples.
* * * * * CMD
The * means all the possible unit — i.e every minute of every hour through out the year. More than using this * directly, you will find it very useful in the following cases. When you specify */5 in minute field means every 5 minutes. When you specify 0-10/2 in minute field mean every 2 minutes in the first 10 minute. Thus the above convention can be used for all the other 4 fields. 5.To schedule a job for more than one time (e.g. Twice a Day) The following script take a incremental backup twice a day every day. This example executes the specified incremental backup shell script (incremental-backup) at 11:00 and 16:00 on every day. The comma separated value in a field specifies that the command needs to be executed in all the mentioned time.
00 11, 16 * * * /home/maverick/bin/incremental-backup
00 – 0th Minute (Top of the hour) 11, 16 – 11 AM and 4 PM * – Every day * – Every month * – Every day of the week 6.To schedule a job for certain range of time (e.g. Only on Weekdays) If you wanted a job to be scheduled for every hour with in a specific range of time then use the following.
- Cron Job everyday during working hours : This example checks the status of the database everyday (including weekends) during the working hours 9 a.m – 6 p.m
00 09-18 * * * /home/maverick/bin/check-db-status
- 00 – 0th Minute (Top of the hour) 09-18 – 9 am, 10 am, 11 am, 12 am, 1 pm, 2 pm, 3 pm, 4 pm, 5 pm, 6 pm * – Every day * – Every month * – Every day of the week
- Cron Job every weekday during working hours : This example checks the status of the database every weekday (i.e excluding Sat and Sun) during the working hours 9 a.m – 6 p.m.
00 09-18 * * 1-5 /home/maverick/bin/check-db-status
- 00 – 0th Minute (Top of the hour) 09-18 – 9 am, 10 am, 11 am, 12 am, 1 pm, 2 pm, 3 pm, 4 pm, 5 pm, 6 pm * – Every day * – Every month 1-5 -Mon, Tue, Wed, Thu and Fri (Every Weekday)
7.To schedule a background Cron job for every 10 minutes. Use the following, if you want to check the disk space every 10 minutes.
*/10 * * * * /home/maverick/check-disk-space
It executes the specified command check-disk-space every 10 minutes through out the year. But you may have a requirement of executing the command only during certain hours or vice versa. The above examples shows how to do those things.Instead of specifying values in the 5 fields, we can specify it using a single keyword as mentioned below. There are special cases in which instead of the above 5 fields you can use @ followed by a keyword — such as reboot, midnight, yearly, hourly. Cron special keywords and its meaning
Keyword Equivalent @yearly 0 0 1 1 * @daily 0 0 * * * @hourly 0 * * * * @reboot Run at startup.
8.To schedule a job for first minute of every year using @yearly If you want a job to be executed on the first minute of every year, then you can use the @yearly cron keyword as shown below.This will execute the system annual maintenance using annual-maintenance shell script at 00:00 on Jan 1st for every year.
@yearly /home/maverick/bin/annual-maintenance
9.To schedule a Cron job beginning of every month using @monthly It is as similar as the @yearly as above. But executes the command monthly once using @monthly cron keyword.This will execute the shell script tape-backup at 00:00 on 1st of every month.
@monthly /home/maverick/bin/tape-backup
10.To schedule a background job every day using @daily Using the @daily cron keyword, this will do a daily log file cleanup using cleanup-logs shell script at 00:00 on every day.
@daily /home/maverick/bin/cleanup-logs "day started"
11.To execute a linux command after every reboot using @reboot Using the @reboot cron keyword, this will execute the specified command once after the machine got booted every time.
@reboot CMD
TOP:-
- The top ( t able o f p rocesses) command shows a real-time view of running processes in Linux and displays kernel -managed tasks. The command also provides a system information summary that shows resource utilization, including CPU and memory usage. In this tutorial, you will learn to use the top command in Linux. A system running Linux.
disk free also known as `df`, which is a powerful utility that provides valuable information on disk space utilization. The df command displays information about file system disk space usage on the mounted file system. This command retrieves the information from `/proc/mounts` or `/etc/mtab`. By default, df command shows disk space in Kilobytes (KB) and uses the SI unit suffixes (e.g, M for megabytes, G for gigabytes) for clarity.
Syntax of `df` command in Linux
df [OPTION]... [FILE]...
If no file name is given, it displays the space available on all currently mounted file systems.
For example:
df
This will display information about all the mounted file systems which will include total size, used space, usage percentage, and the mount point.
In this article we have discussed `df` command which is a powerful tool for monitoring disk space usage on Linux System. By understanding its options that we have discussed and using them effectively to get useful information like file system usage, identify potential storage constraints and make informed decisions regarding resource allocation and management.
df [OPTION]... [FILE]...If no file name is given, it displays the space available on all currently mounted file systems.
For example:
dfThis will display information about all the mounted file systems which will include total size, used space, usage percentage, and the mount point.
In this article we have discussed `df` command which is a powerful tool for monitoring disk space usage on Linux System. By understanding its options that we have discussed and using them effectively to get useful information like file system usage, identify potential storage constraints and make informed decisions regarding resource allocation and management.
Comments
Post a Comment